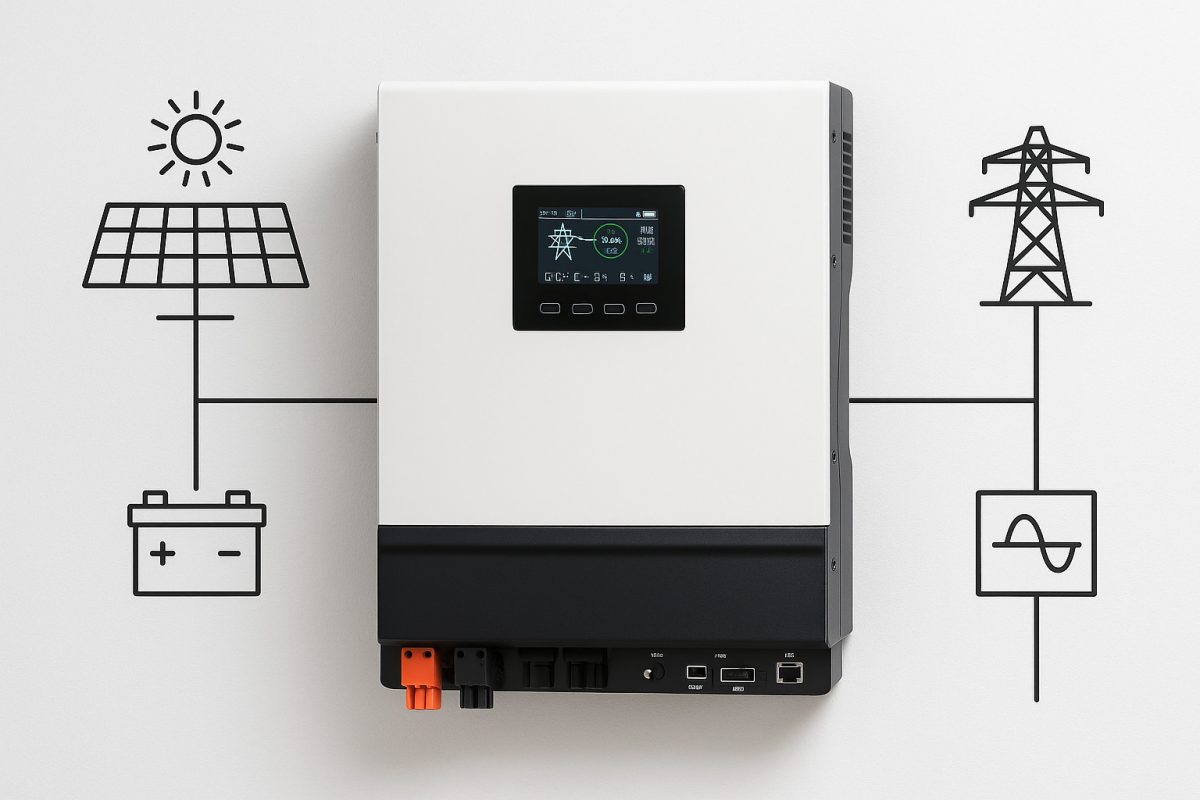
In a solar-plus-storage setup, the inverter is the heart of the system: it converts DC from panels or batteries into usable AC, manages battery charging/discharging, and handles grid interactions. Choosing the right inverter directly affects system reliability, efficiency, and return on investment. This article cuts through the jargon to explain core inverter functions, critical specs, and a streamlined approach to pick the model that fits your needs.
Core Roles of an Inverter
-
DC-to-AC Conversion: Transforms battery or PV-generated DC into AC matching your load and grid requirements. Quality of the sine wave matters for sensitive electronics.
-
Battery Management: Controls charging (from PV or grid) and discharging to loads. Ensures safe voltage/current limits, optimizes battery life.
-
Grid Interaction:
-
Grid-tied: Feeds surplus solar into the grid when allowed; stops operation on grid fault for safety.
-
Off-grid/Backup: Supplies loads from batteries when the grid is absent. A true UPS function switches seamlessly.
-
Hybrid: Combines both: uses PV/grid to charge batteries, supplies loads in normal or outage conditions, and can export/import as policy or regulations allow.
-
-
System Coordination & Monitoring: Tracks generation, consumption, battery state-of-charge (SoC), handles automatic mode switching (e.g., grid priority vs. solar priority), and provides data to monitoring platforms.
Key Specifications Explained
Below are the essential parameters to focus on, with direct advice on what matters:
-
Continuous Output Power (Rated Power) & Surge Capability
-
Rated Power: The steady AC output the inverter can deliver (e.g., 10 kW). Choose an inverter whose rated power comfortably exceeds your highest expected continuous load plus a margin (commonly 20–30%).
-
Surge Power: Short-term peak (seconds) handling of inrush loads—motors, compressors, pumps. Check that surge rating covers startup currents of major appliances. If many high-inrush devices exist, size accordingly or consider adding a small UPS/soft-start device.
-
-
Output Voltage & Phase Configuration
-
Match local grid or load requirements: single-phase (e.g., 120 V or 230 V) or split-phase (120/240 V common in North America) or three-phase (for larger installations).
-
If you run both 120 V and 240 V loads (e.g., in the U.S.), split-phase output is highly convenient. Confirm the inverter supports your region’s nominal voltage and phase arrangement.
-
-
Battery Voltage & Compatibility
-
Inverter must match the battery bank voltage (e.g., 48 V DC). Verify compatibility with battery chemistry: lead-acid (AGM, gel), Li-ion, LiFePO4, etc.
-
Check maximum charge/discharge current the inverter provides: it should align with battery manufacturer’s recommended charge rates to avoid degrading battery life.
-
-
PV Input & MPPT Characteristics
-
Max PV Input Power: Total solar array wattage the inverter can handle. It’s common to size PV array slightly above inverter rating (10–30%) to boost morning/evening harvest, but don’t exceed inverter’s maximum.
-
MPPT Voltage Range: The DC voltage window within which the inverter’s MPPT can operate (e.g., 125–425 V). Your PV string(s) must fall within that range under normal and cold conditions (check open-circuit voltage).
-
Max Open-Circuit Voltage (Voc): PV string Voc at lowest expected temperature must not exceed this limit (e.g., 500 V).
-
Start-Up Voltage: Minimum PV voltage to activate MPPT (e.g., >130 V). Below this, MPPT won’t engage; ensure string voltage stays above threshold whenever sun is available.
-
-
Operation Modes & Prioritization
-
Charging Modes: Options like PV-only charging, grid-first charging, hybrid charging. Choose inverter offering flexible charging logic that matches your goals: maximize self-consumption, perform time-of-use arbitrage, or maintain battery reserve.
-
Supply Priority: Solar-first, grid-first, or battery-first operation. A clear interface or monitoring app to set these modes is valuable for adjusting strategy as conditions or pricing change.
-
Seamless Transfer: For backup, inverter should switch to battery/solar in <50 ms (or as required by sensitive loads). Some inverters have true UPS capability; confirm the switchover time meets your critical load needs.
-
-
Parallel & Expansion Capability
-
If you anticipate growing load or PV capacity, select an inverter that supports parallel operation (multiple units tied together). Confirm how many units can be paralleled and how control/communication works in multi-unit setups.
-
-
Efficiency Metrics
-
Look beyond a single “peak efficiency” figure. Review efficiency curves at different load levels. A good inverter maintains high efficiency (~95–98%) across the typical operating range. High MPPT efficiency (tracking accuracy) also boosts energy harvest.
-
-
Communication & Monitoring Interfaces
-
Common protocols: CAN, RS485/Modbus, Ethernet/Wi-Fi. Decide whether you need integration with home energy management systems or third-party monitoring. Ensure the inverter’s communication protocol is supported by your platform or that the vendor provides reliable monitoring software with alerts.
-
-
Protection Features & Certifications
-
Essential protections: over/under voltage, over/under frequency, overcurrent, short-circuit, anti-islanding (for grid-tied), reverse polarity, over-temperature.
-
Environmental rating (IP code): Indoor-only (IP20) vs. outdoor-capable (e.g., IP65). Choose based on installation site.
-
Certifications: Comply with local standards (e.g., UL1741/IEEE1547 in the U.S., CE with relevant EN standards in Europe). Lack of proper certification can block grid interconnection approval.
-
-
Environmental & Installation Considerations
-
Operating temperature range: Extreme heat reduces output or life—ensure the inverter suits local climate or plan appropriate ventilation/shading.
-
Altitude: High-altitude installations may need derating.
-
Physical size, weight, and mounting method: Check that installation location can accommodate the inverter and allows for necessary clearances for cooling and service access.
-
-
Peak Shaving & Time-of-Use Strategies
-
If electricity pricing varies by time, the inverter (or associated EMS) should allow scheduling: charge during low-tariff hours and discharge in peak periods. Confirm the user interface or API supports easy scheduling.
-
-
Battery-less Operation
-
Some hybrid inverters can run without a battery, passing PV or grid power directly to loads. This allows initial PV-only deployment and later adding batteries. Check if the inverter auto-“wakes” battery when added.
-
Streamlined Selection Process
-
Assess Your Load Profile Quickly
-
List major loads with continuous and startup power demands. Identify peak continuous power and peak inrush loads. Use manufacturer specs or typical values.
-
Determine what must stay powered during an outage (critical loads) vs. non-critical.
-
-
Clarify System Goals
-
Backup only, self-consumption maximization, time-of-use arbitrage, full off-grid capability? Your primary goal narrows required inverter features (e.g., UPS speed, PV capacity, battery management sophistication).
-
-
Match Battery Bank
-
Select battery chemistry and size based on backup duration and cycling needs. Ensure inverter’s voltage and charge/discharge current fit the battery specs.
-
-
Design PV Array to Fit MPPT
-
Calculate string size so operating voltage stays within MPPT window in all conditions. Aim for array power modestly above inverter’s PV input rating if improving harvest matters.
-
-
Choose Inverter Features per Priorities
-
Backup speed: For sensitive equipment, ensure rapid switchover or pure sine wave quality.
-
Expansion: If growth is likely, pick a model supporting parallel units.
-
Monitoring: If hands-on monitoring or integration is needed, confirm communication options.
-
Grid compliance: Verify certifications align with local interconnection rules.
-
Installation site: Indoor vs. outdoor rating, cooling requirements.
-
-
Review Vendor Reputation & Support
-
Seek brands or suppliers with proven track records, good warranty terms, accessible service. Read user forums or case studies focusing on reliability.
-
-
Budget vs. Performance Trade-offs
-
Avoid under-spec’d low-cost models lacking essential protections or efficient MPPT. Balance upfront cost against long-term reliability and energy yield.
-
-
Finalize & Test
-
Once selected, plan for professional installation and commissioning. During testing, verify modes (grid-tied export, islanding, backup switching), monitor efficiency, and confirm communication/monitoring works as intended.
-
Practical Tips & Avoiding Pitfalls
-
Don’t oversize or undersize carelessly: Too small inverter causes overloads; too large PV array can cause clipping but may be acceptable within limits—check manufacturer guidance.
-
Mind voltage ranges: Incorrect string voltage is a common error; always model worst-case Voc.
-
Check firmware update process: Ability to update firmware can add new features or fix bugs; ensure vendor provides clear procedure.
-
Monitor early and often: Establish remote alerts for faults or abnormal behavior; early detection prevents prolonged downtime.
-
Plan for heat management: In hot climates, consider shaded, ventilated inverter enclosure to avoid derating.
-
Understand warranty scope: Does warranty cover inverters used in off-grid vs. grid-tied? Are batteries covered separately?
-
Simplify user interface: Inverters that expose too many complex settings can be confusing; look for a balance between flexibility and ease of configuration.
Conclusion
In short, focus on matching inverter continuous and surge power to load, ensuring battery voltage and charge rates align, designing PV strings within the MPPT window, and selecting operation modes that serve your energy goals (backup, self-consumption, or arbitrage). Confirm certifications, protections, and monitoring interfaces. For example, a 10 kW hybrid inverter with split-phase output, dual MPPT, and battery-less startup capability is a strong choice for a mid-size residential system in North America. Use the outlined checklist: load profile → battery specs → PV design → inverter feature set → vendor reliability. By concentrating on these essentials, you can quickly identify an inverter that meets your technical needs and long-term performance expectations without wading through boilerplate marketing.


